Report Wizard
The Report Wizard is your tool to create simple custom reports. For example, you might choose to use the Report Wizard to create a listing of manufacturers. To do this, refer to the Data Dictionary on Tri-Tech's Downloads page through the Member Portal for the appropriate manufacturer information to include on the report. If you need to create more complex custom reports, contact Tri-Tech Technical Support for assistance. In most cases, we can create a custom report for you for a nominal charge.
Report Wizard
From the menu bar, click Reports and click Report Wizard or press Alt R R on the keyboard.
The Report Wizard is a utility that enables you to create your own reports. You specify the requirements used to select the information, the information to appear on the report and the order the information should appear in. Once the report is established you may run the report at any time.
At this time, the Report Wizard may only be used to create a report from data in one file. These instructions will be updated as soon as the capability to create reports based on associations in multiple files is available.
In order to give you an idea of how to create a report in the Report Wizard, I will walk you through setting up a simple report to list inventory categories and associated sub categories.
- Click Reports on the menu bar.
- Click Report Wizard. The window pictured below will appear:

- Click the New button.
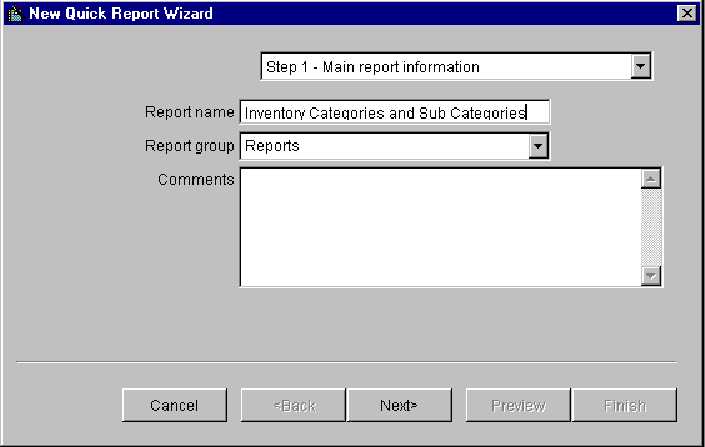
- Type Inventory Categories and Sub Categories as the Report name, as in the picture shown below:
- Click Next.
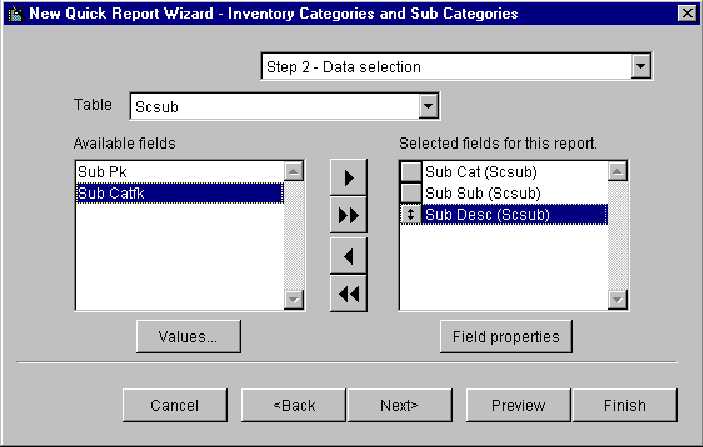
- Click in the Table box and select Scsub.
- In the Available fields box click Sub Cat and click
 , click Sub Sub and click
  and click Sub Desc and click
  . The window should appear as pictured below:
- Click Next.
- Click Next (there is no filter).
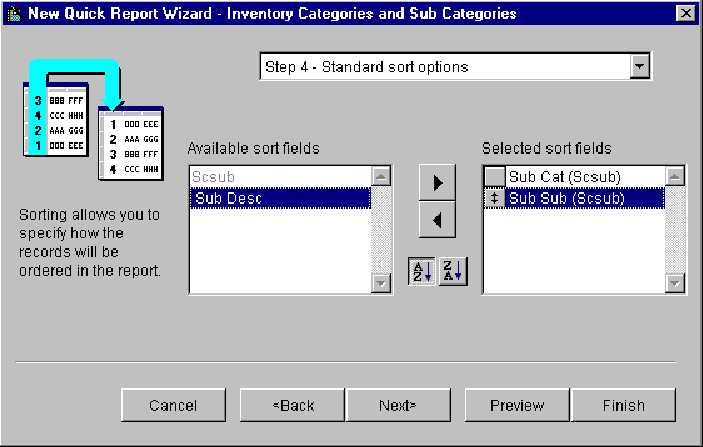
- We would like the report sorted first by category and then sub category so first click Sub Cat and click
 . Next, click Sub Sub and click
  . We want to list the report in ascending numerical order so be certain the
  button is depressed. The window should appear as pictured below:
- Click Next.
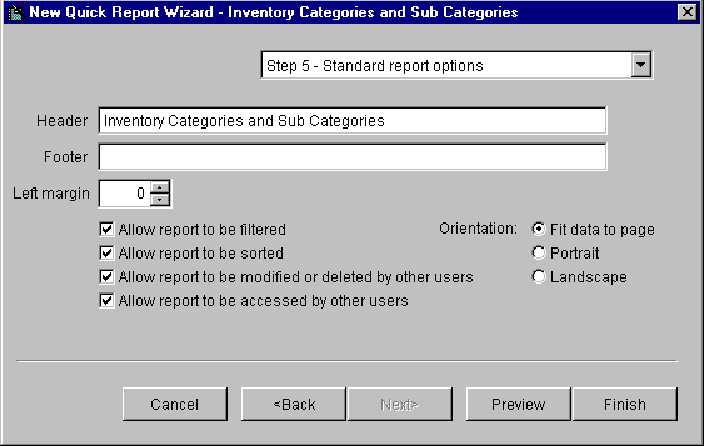
- As the Header, type Inventory Categories and Sub Categories (this is the header that will print at the top of the report). The window should appear as pictured below:
- Click Finish.
You are now back to Step 1 - Select a report. The new report we just created will appear in the box under 'Reports'. To view the new report on screen, click Inventory Categories and Sub Categories and click Preview. To print the new report, click Inventory Categories and Sub Categories and click Print.
Let's say you have viewed the report and would like to make the following changes:
- Change the font style and size
- Change the category and sub category to red
- Change the descriptions of the columns to Category, Sub Category and Description
- Move the left margin to the right a bit.
Follow the steps below to make these changes.
- Click Reports on the menu bar.
- Click Report Wizard.
- Click Inventory Categories and Sub Categories and click Edit.
- We are not making changes here so click Next.
- In the Selected fields for this report box, click Sub Cat and click Field Properties. The window pictured below will appear:
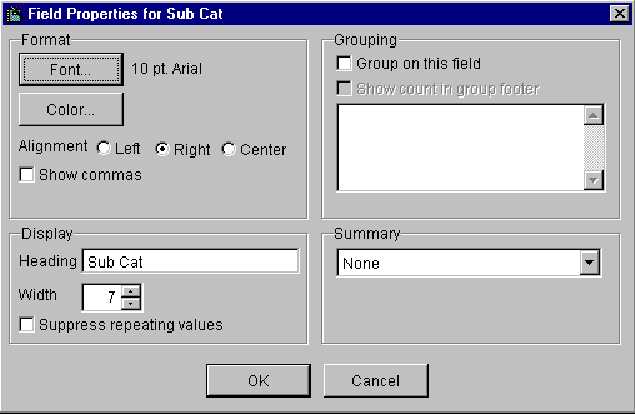
To change the font style and size, click the Font button. I am going to change the font to Verdana and the size to 11. Click OK.
To change the font color, click the Color button. I am going to change the color to red. Click OK.
To change the heading of the category column, click in the Heading box. I am going to change the heading to Category. Click OK.
- You will now be back at the Step 2 – Data selection window. In the Selected fields for this report box, click Sub Sub and click Field Properties.
I am going to click the Font button in order to change the font to Verdana and size to 11. Click OK.
I am going to click the Color button in order to change the color to red. Click OK.
I am going to click in the Heading box and change the heading to Sub Category. Click OK.
- You will now be back at the Step 2 – Data selection window. In the Selected fields for this report box, click Sub Desc and click Field Properties.
I am going to click the Font button in order to change the font to Verdana and size to 11. Click OK.
I am going to keep the color black.
I am going to click in the Heading box and change the heading to Description. Click OK.
- You will now be back at the Step 2 – Data selection window. Click Next.
- Click Next (we are not adding a filter).
- Click Next (we are not changing the sort options).
- Increase the Next Margin to 3 and click Finish.
You are now back to Step 1 – Select a report. To view on screen the changes we made, click Inventory Categories and Sub Categories and click Preview. To print the report, click Inventory Categories and Sub Categories and click Print.